Reference Guide: Squarespace
Contents:
1. Basic AVERT Website Structure.
2. Creating A New Page (or Blog)
3. Editing Content
a. Basic Text (not in Expanding Text Boxes)
b. Editing/Resizing/Moving Images
c. Editing text in the Extended Biographies (Research Members & Structures and Governance)
d. Adding a new Profile with Extended Biography
e. Adding or Removing Events
f. Adding an 'External Link' in Resources and Related Networks
g. Adding a New Resource in Resources and Related Networks
1. Basic AVERT Website Structure
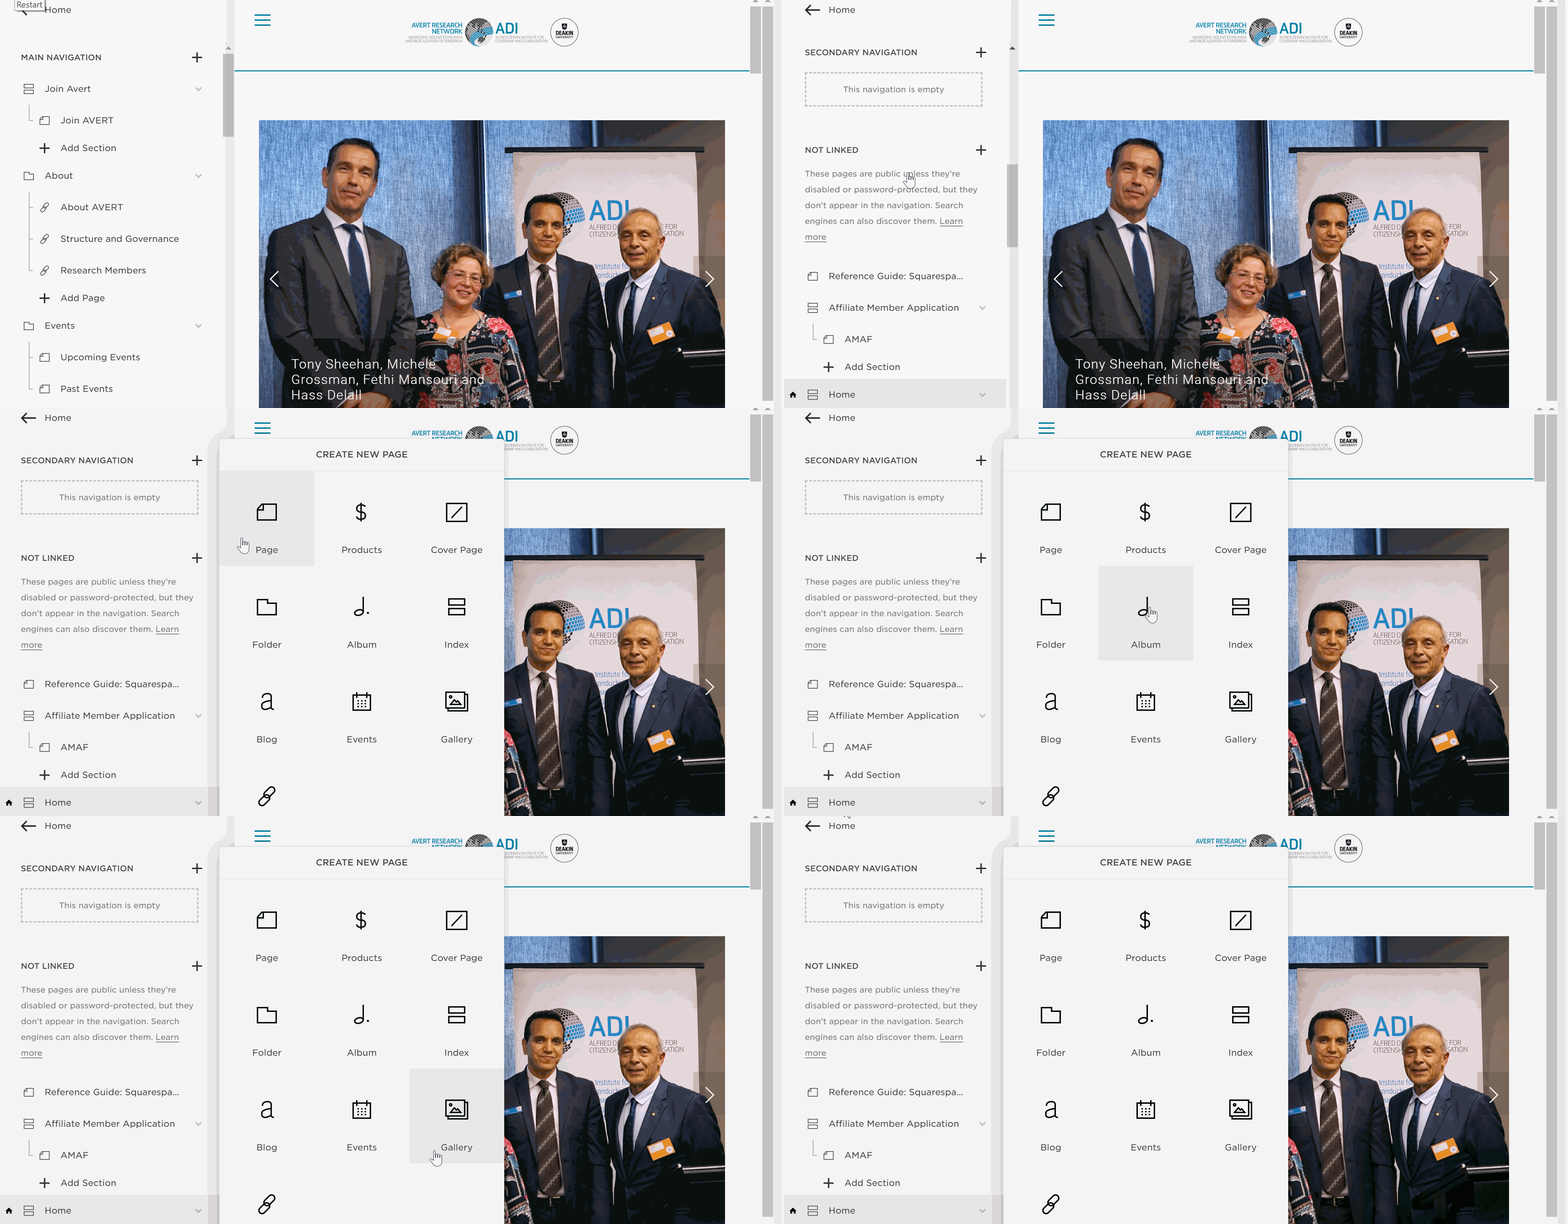
When you first log into your Squarespace website, you will spot a grey menu on the left-hand side of your screen. This menu contains every page currently active on your site.
The side menu is divided into three sections:
Main Navigation: These are the links and pages visible in the navigation on the very top of your website.
Secondary Navigation: These pages would be visible if the AVERT website had a secondary navigation set-up. It does not, so please do not use this section.
Not Linked: These pages are not visible in any navigation, but may be linked to indirectly. For example, the home page does not have a navigation link of its own, however any time you click on the logo you will end up on the home page.
To view or edit the content of any page in this menu, you will need to left-click on the title of the page. To add items to the main navigation, simply drag and drop.
2. Creating A New Page
To create a new page on your Squarespace site, find the section in the side navigation where you would like it to live ('main navigation', 'secondary navigation' or 'not linked') and press the + icon found to the right of the section name.
A 'create new page' dialogue will appear with several page types to choose from.
Page: Choose this option if you would like a simple page with a single colour background (like this one). If you would like a multi-colour background like the 'About AVERT' page currently live on the website, choose Index.
Products: This section allows you to sell products directly through the site. It is easy to set up (upload a picture of a product, set a price and shipping details) and included in all Squarespace Memberships. You will need to set up a 'sellers' account with Paypal or Square to process payments. Read more about Squarespace eCommerce here.
Cover Page: This page can be added if you'd like to close to the site for maintenance. Visitors will see the cover page and nothing else. Read more about it here.
Folder: This is useful if you'd like to have a new option in your main navigation with sub-options that appear in a drop-down underneath (like the 'About' section in the main navigation). The folder isn't a page in itself - the only clickable options will be the ones that appear underneath it. You can either drag and drop 'Pages' to appear as the sub-options underneath, or as I have done in the About AVERT section, create a folder with 'Links' underneath that direct the visitor to 'Index' pages (which cannot be dragged into folders). More info is available here.
Album: Stream audio files directly on your website! (This section is optimised for music albums, and not podcasts).
Index: An Index page is essentially a collection of nested 'Pages'. It is a powerful tool that allows you to have a different coloured background for different sections of your page (such as in the 'About AVERT' page) or to set images as backgrounds for specific sections.
Blog: Exactly as described! You can create as many blogs as you'd like and feed them through to other sections of the website.
Events: Another option for displaying events - however this has limited functionality for uploading large documents/image brochures.
Gallery: A photo gallery page. Could be a good one for showing photos from events. Please note - if you'd prefer to have plenty of text AND a gallery, if you create a new 'Page', you can install a 'Gallery Block' which has the same functionality but becomes a part of the layout - like the slider on the home page of the AVERT website.
Link: Allows you to have an item in your navigation that 'links' directly to another page, internal to the AVERT website or external. The 'About' drop down on the AVERT website is styled with links as you cannot have Index pages in a folder.
3. Editing Content
a. Editing Basic Text:
b. Editing/Resizing/Moving Images
c. Editing text in the Extended Biographies (Research Members & Structures and Governance)
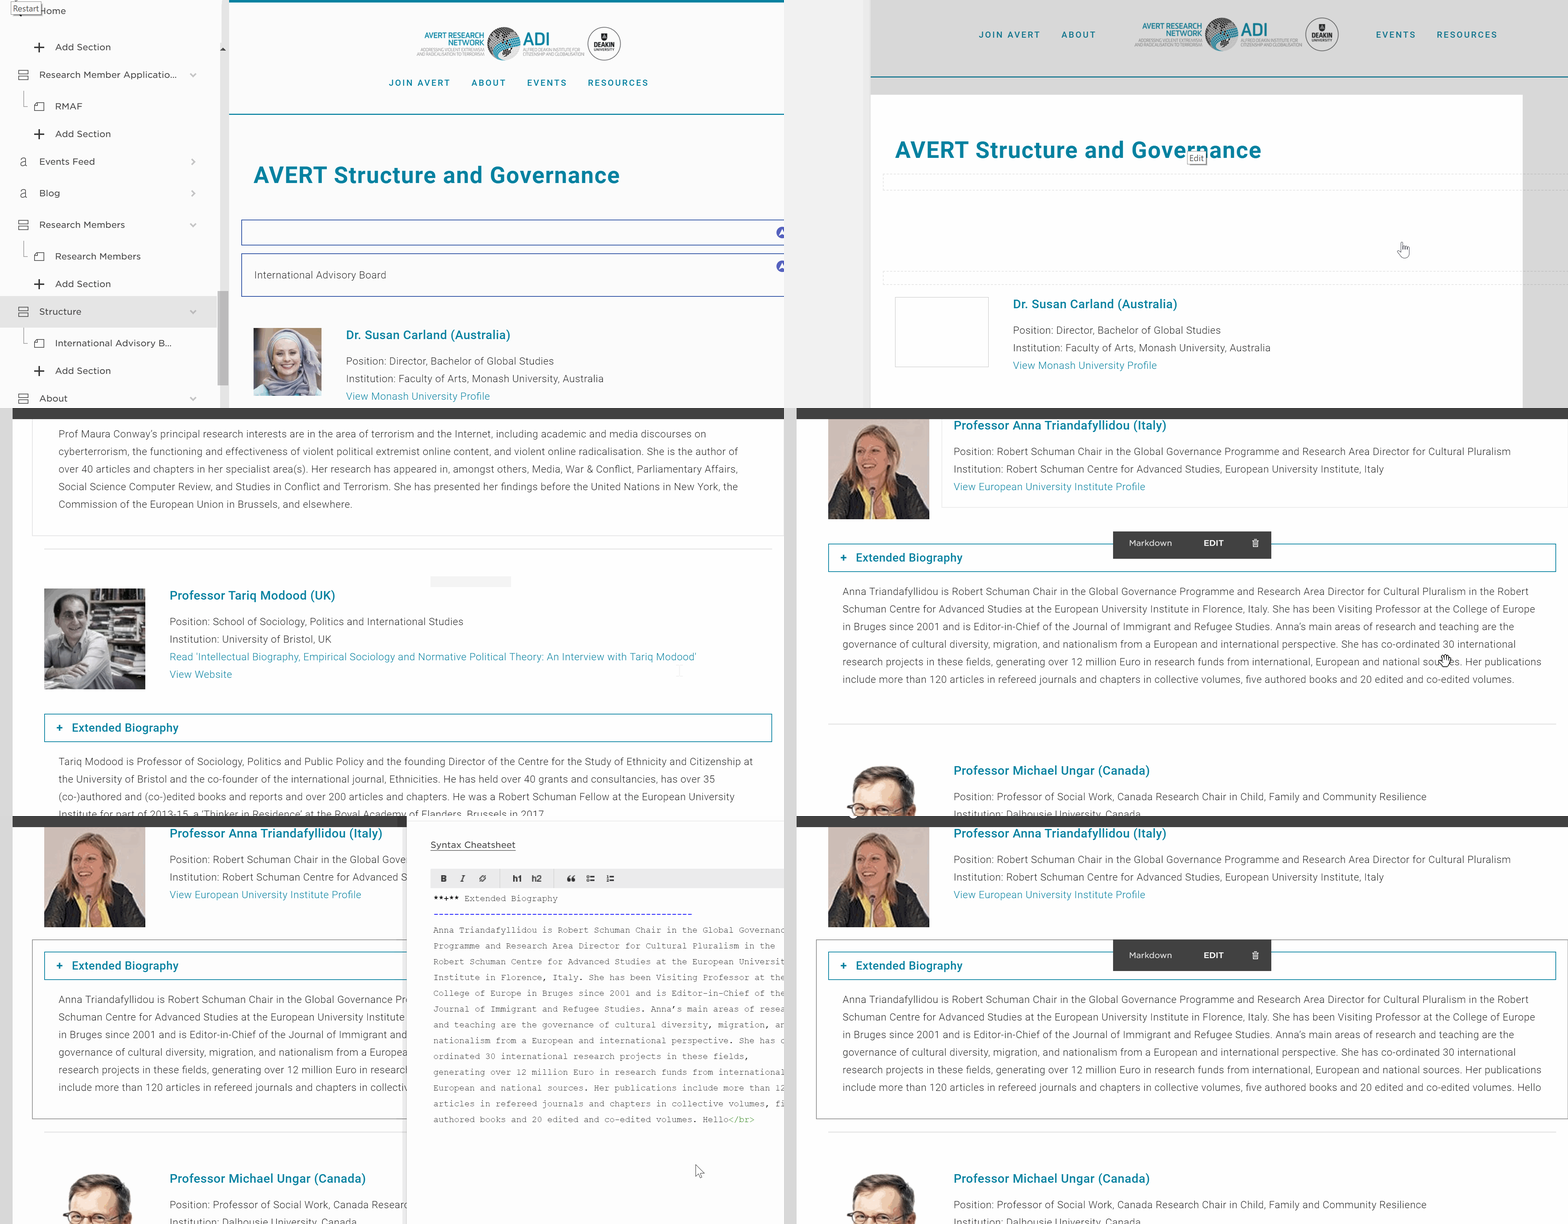
The 'Extended Biographies' that exist in Structure and Governance are coded - that is to mean, it's not quite as simple as editing the text on other areas of the AVERT website, especially since they are categorised under tabs, International Advisory Board, Steering Committee and Community Advisory Board. To edit any of the biographies, simply find the one of the individual you'd like in any of the three tabs (scroll down until you find the tab and individual you would like to edit) and edit the 'markdown'. The #, + and <br> symbols mixed in the code are vital to their operation.
d. Adding a new Profile with Extended Biography
To add a new profile, it is a matter of copying and pasting the elements from someone else's profile and changing the text to the details of the new member.
1. Add a line to divide the individual profiles.
2. Add the image of the individual (it should be a square).
3. Copy and paste the name and profile details from another individual above into a new text box.
4. Move the profile details (drag and drop) next to the photo and pull them to the left.
4. Copy the content from an existing 'extended biography' markdown into a new markdown box.
5. Begin personalising the content.
e. Adding or Removing Events
In order to make room for some of the bigger brochure style images available on the events, I have made an 'events feed' in the left hand side pages menu that is the home for all events past and present. Simply click on 'events feed', followed by the + button on the right hand side.
Once the images and details of your event have been entered into the post (and you have clicked save), it will automatically feed through to the home page. It does not however, feed directly through to the events page (for style purposes). Once the event has been created in the feed, grab the URL and head to the 'upcoming events page'. Once there, either edit an existing event, or add a new 'poster'. Add a button that links directly to the post you just created in the events feed.
f. Adding an 'External Link' in Resources and Related Networks
Okay! This one might look scary, but it isn't, trust me. Firstly, as External Links and Resources are on one page with tabs, we will need to find the 'Resources and Related Networks' page in the Main Navigation to edit it. Once you have it up, hit edit on the table and admire all that pretty, pretty code.
It is actually not as hard to change as it looks! Simply scroll to the bottom of the code, where the last thing you see should be </table>. It will look a little something like this:
CODE EXAMPLE:
<tr>
<td class="tg-f9ur"><a href="http://www.egmontinstitute.be/" target="_blank">Egmont Royal Institute for International Relations</a></td>
</tr>
<tr>
<td class="tg-uz9j"><a href="https://www.st-andrews.ac.uk/~cstpv/" target="_blank">Centre for the Study of Terrorism and Political Violence</a></td>
</tr>
</table>
Okay, so let's break this down, Mystery School Bus style!
<tr> = this little bit of code says 'let's do a new row in our lovely table' or the easy way to remember it - table row = tr!
<td class="tg-f9ur"> This fancy beast determines what colour the row will be. In the code example above, you can see that there are two different 'classes', tg-f9ur and tg-uz9j. tg-f9ur is grey, whereas tg-uz9j is white. Easy right? So in our example above, the first row will be grey, and the following row will be white.
<a href="http://www.egmontinstitute.be/" target="_blank">Egmont Royal Institute for International Relations</a></td> This is your content! You can see in this table row, the words 'Egmont Royal Institute for International Relations' will be what is displayed, meanwhile those words will link directly to the URL http://www.egmontinstitute.be/.
</tr> This little code says hey, the table row can end now, what's next?
</table> This means the table has come to an absolute end!
Now when we review the code example above, we can see that there are in fact two table rows - one with a white background and one with a grey.
In order to add a new line to the table, we just need to take a look and see what was the last colour.
If the last row was white, simply paste in the below code above the </table> and personalise.
<tr>
<td class="tg-f9ur"><a href="http://www.egmontinstitute.be/" target="_blank">Egmont Royal Institute for International Relations</a></td>
</tr>
If the last row was grey, simply paste in the below code above the </table> and personalise.
<tr>
<td class="tg-uz9j"><a href="https://www.st-andrews.ac.uk/~cstpv/" target="_blank">Centre for the Study of Terrorism and Political Violence</a></td>
</tr>
Easy!
g. Adding a New Resource in Resources and Related Networks
1. Take a screenshot of the cover of the PDF you want to include in the list.
2. Copy the below image into any photo editor, and drop your new screenshot on top of it, replacing the old cover with your new one (so it appears your new cover has the same shadowing).
3. Save the file is a .png or .jpg and upload it to the Resources section of the website.
4. Copy the text from underneath one of the other resources and paste it into a new text box underneath your new image. Personalise it with the new details.
It is important that when you are ready to upload your new cover image, that when you hover the text of another entry you would like it to sit under, you look for the small line - not the long one. See example:


